Raspberry is One of the most versatile computer publiclly available. from it small form factor and cheap price tag to the open-source os, Raspberry PIs are powerfull computers with virtually infinite uses.
I Personllly would highly recommanded any indiviaual interested in IT to purchase a raspberry pi, it open up a large new world of possibility
This article is the first of my Raspberry Pi project Series, in which i will
focus mainly on Raspberry related project, from Configuring a webserver to
hosting a gaming LAN, Join me in exploring the limitless world of The
Raspberry Pi.
So, let’s get started.
To follow this article, you will need the following things to set up your Raspberry Pi in headless mode:
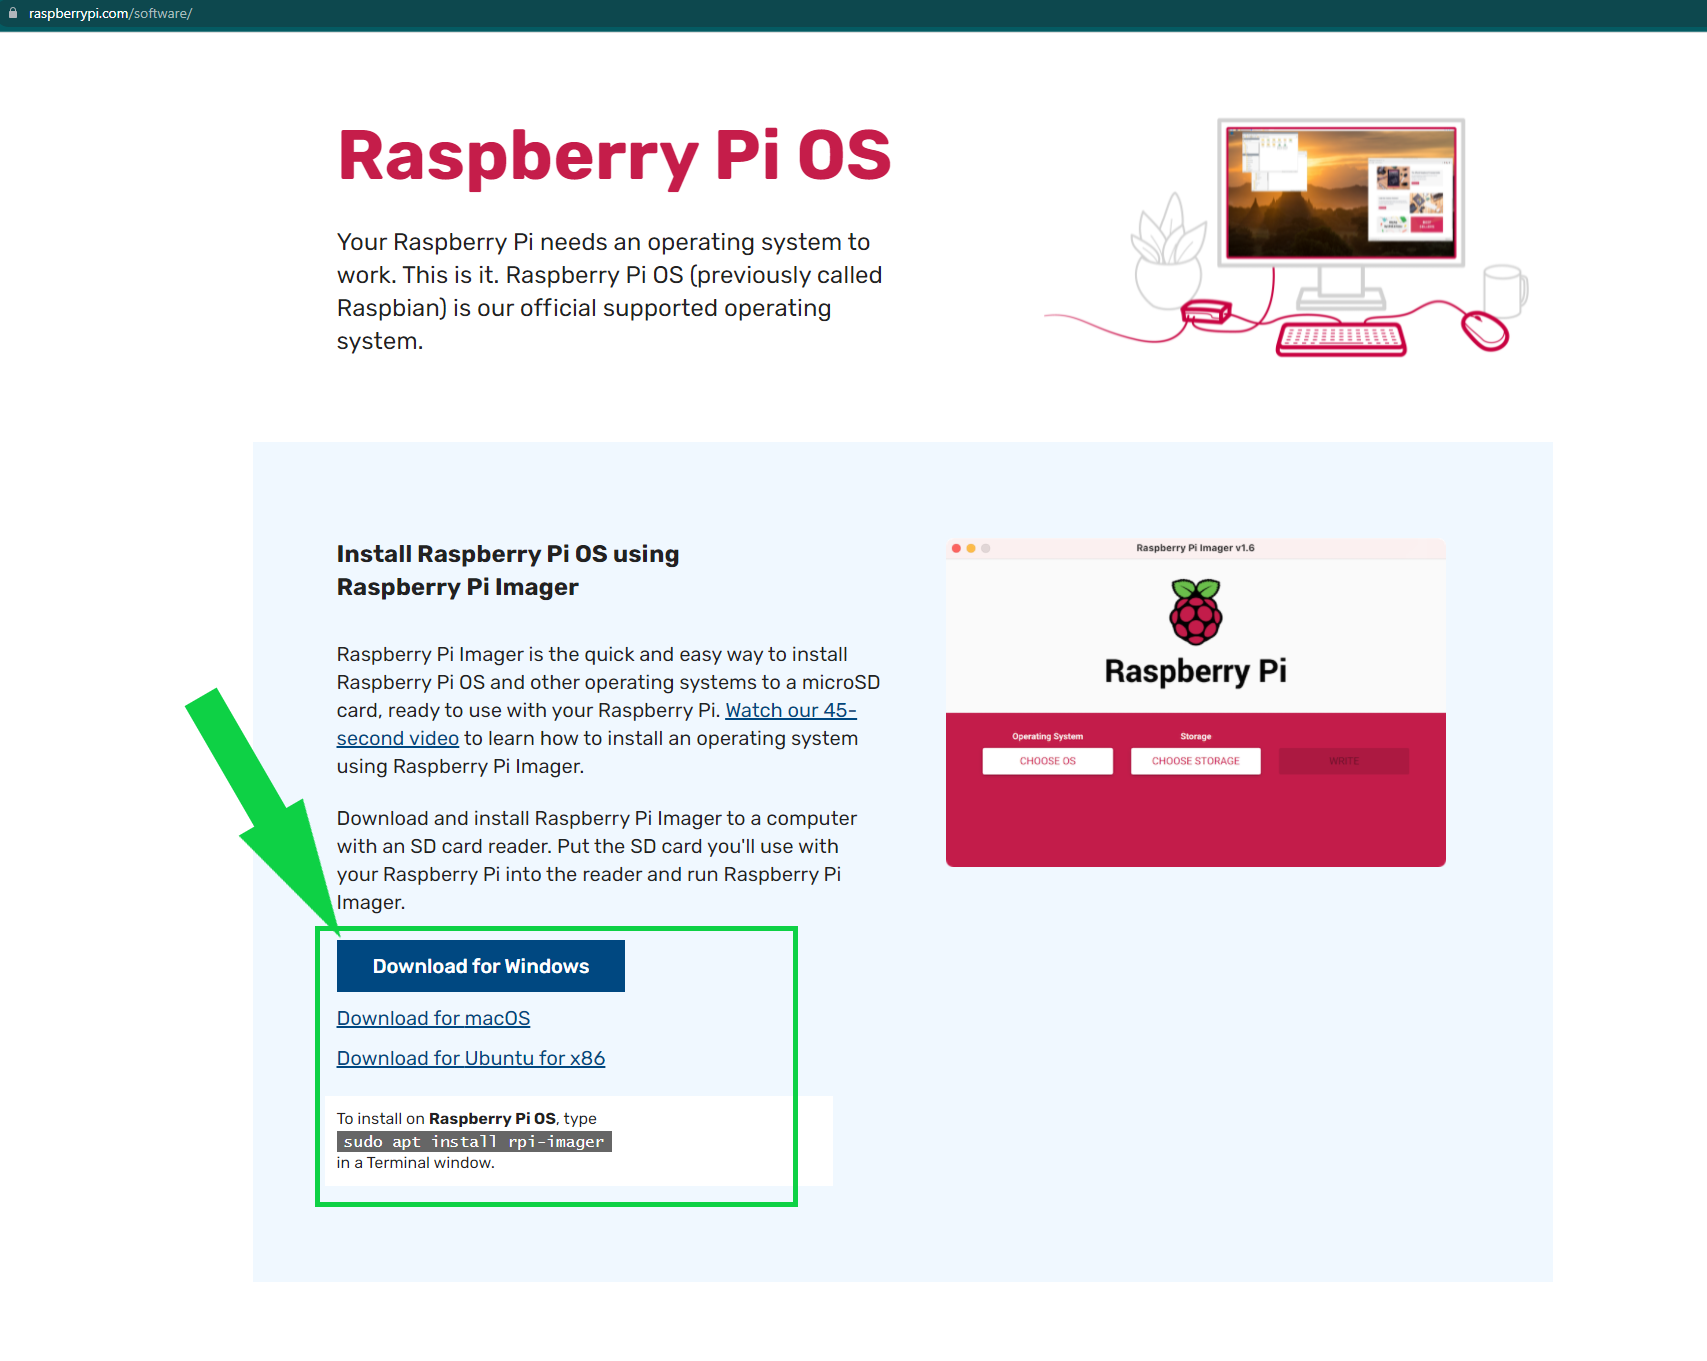
Download and Install Raspberry Pi Imager
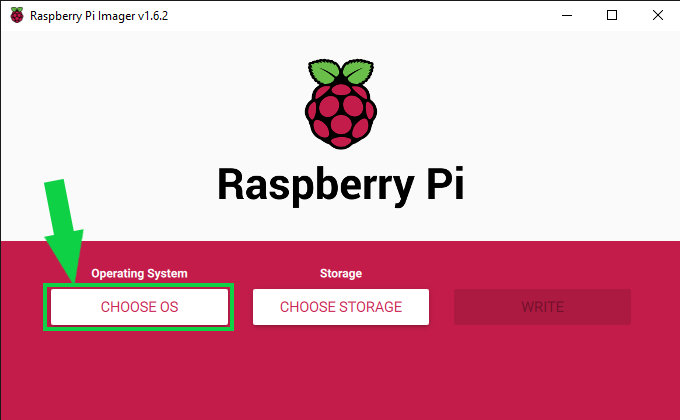
 Step 2
once Installed, open and select Os
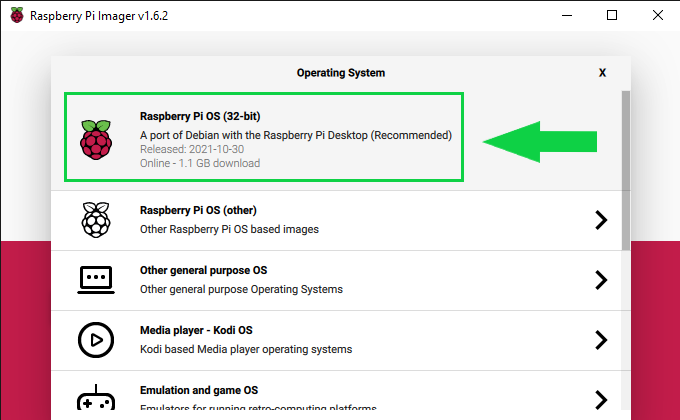
 Step 3
Select Raspberry Pi OS (32-bit)
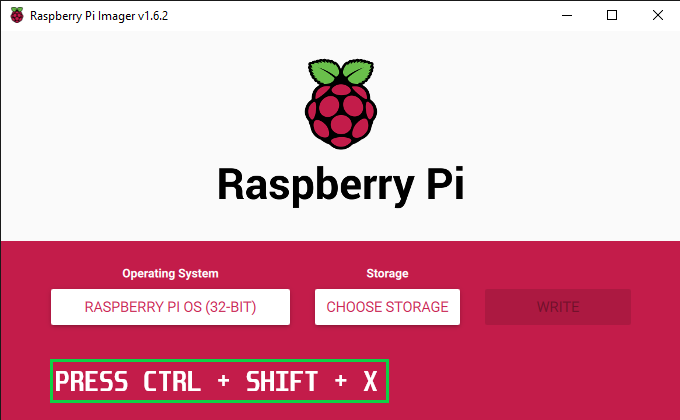
 Step 4
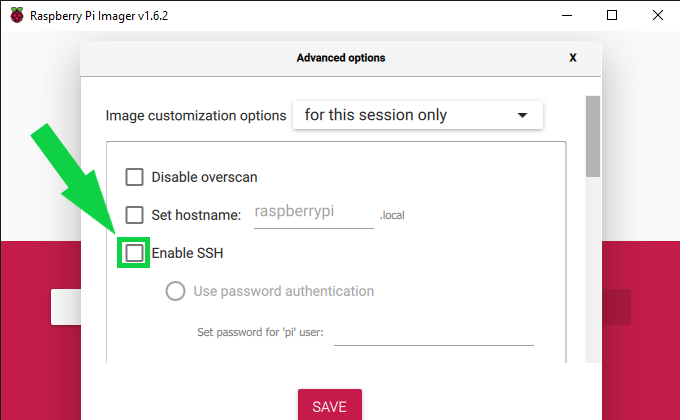
On your Keyboard, Press Together "CTRL", "SHIFT" and "X" to open Advance Option
 Step 5
In Advance Option, Click "Enable SSH" to enable ssh connection
 Step 6
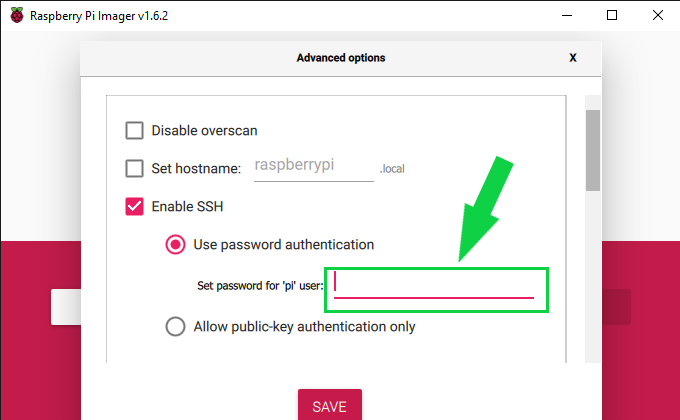
select "Use password authenthication and input password
 Step 7
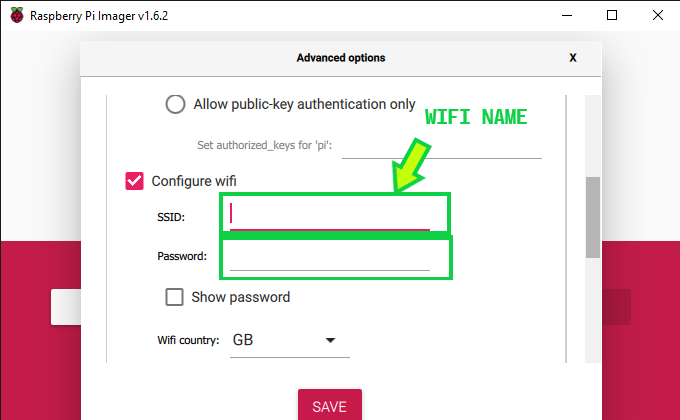
Enter Wifi Name And password if Enthernet cable is unavailable.
select GB for the default of Wifi country and press "SAVE"
 Step 8
imput your MicroSD into your SD Card Reader/Writer
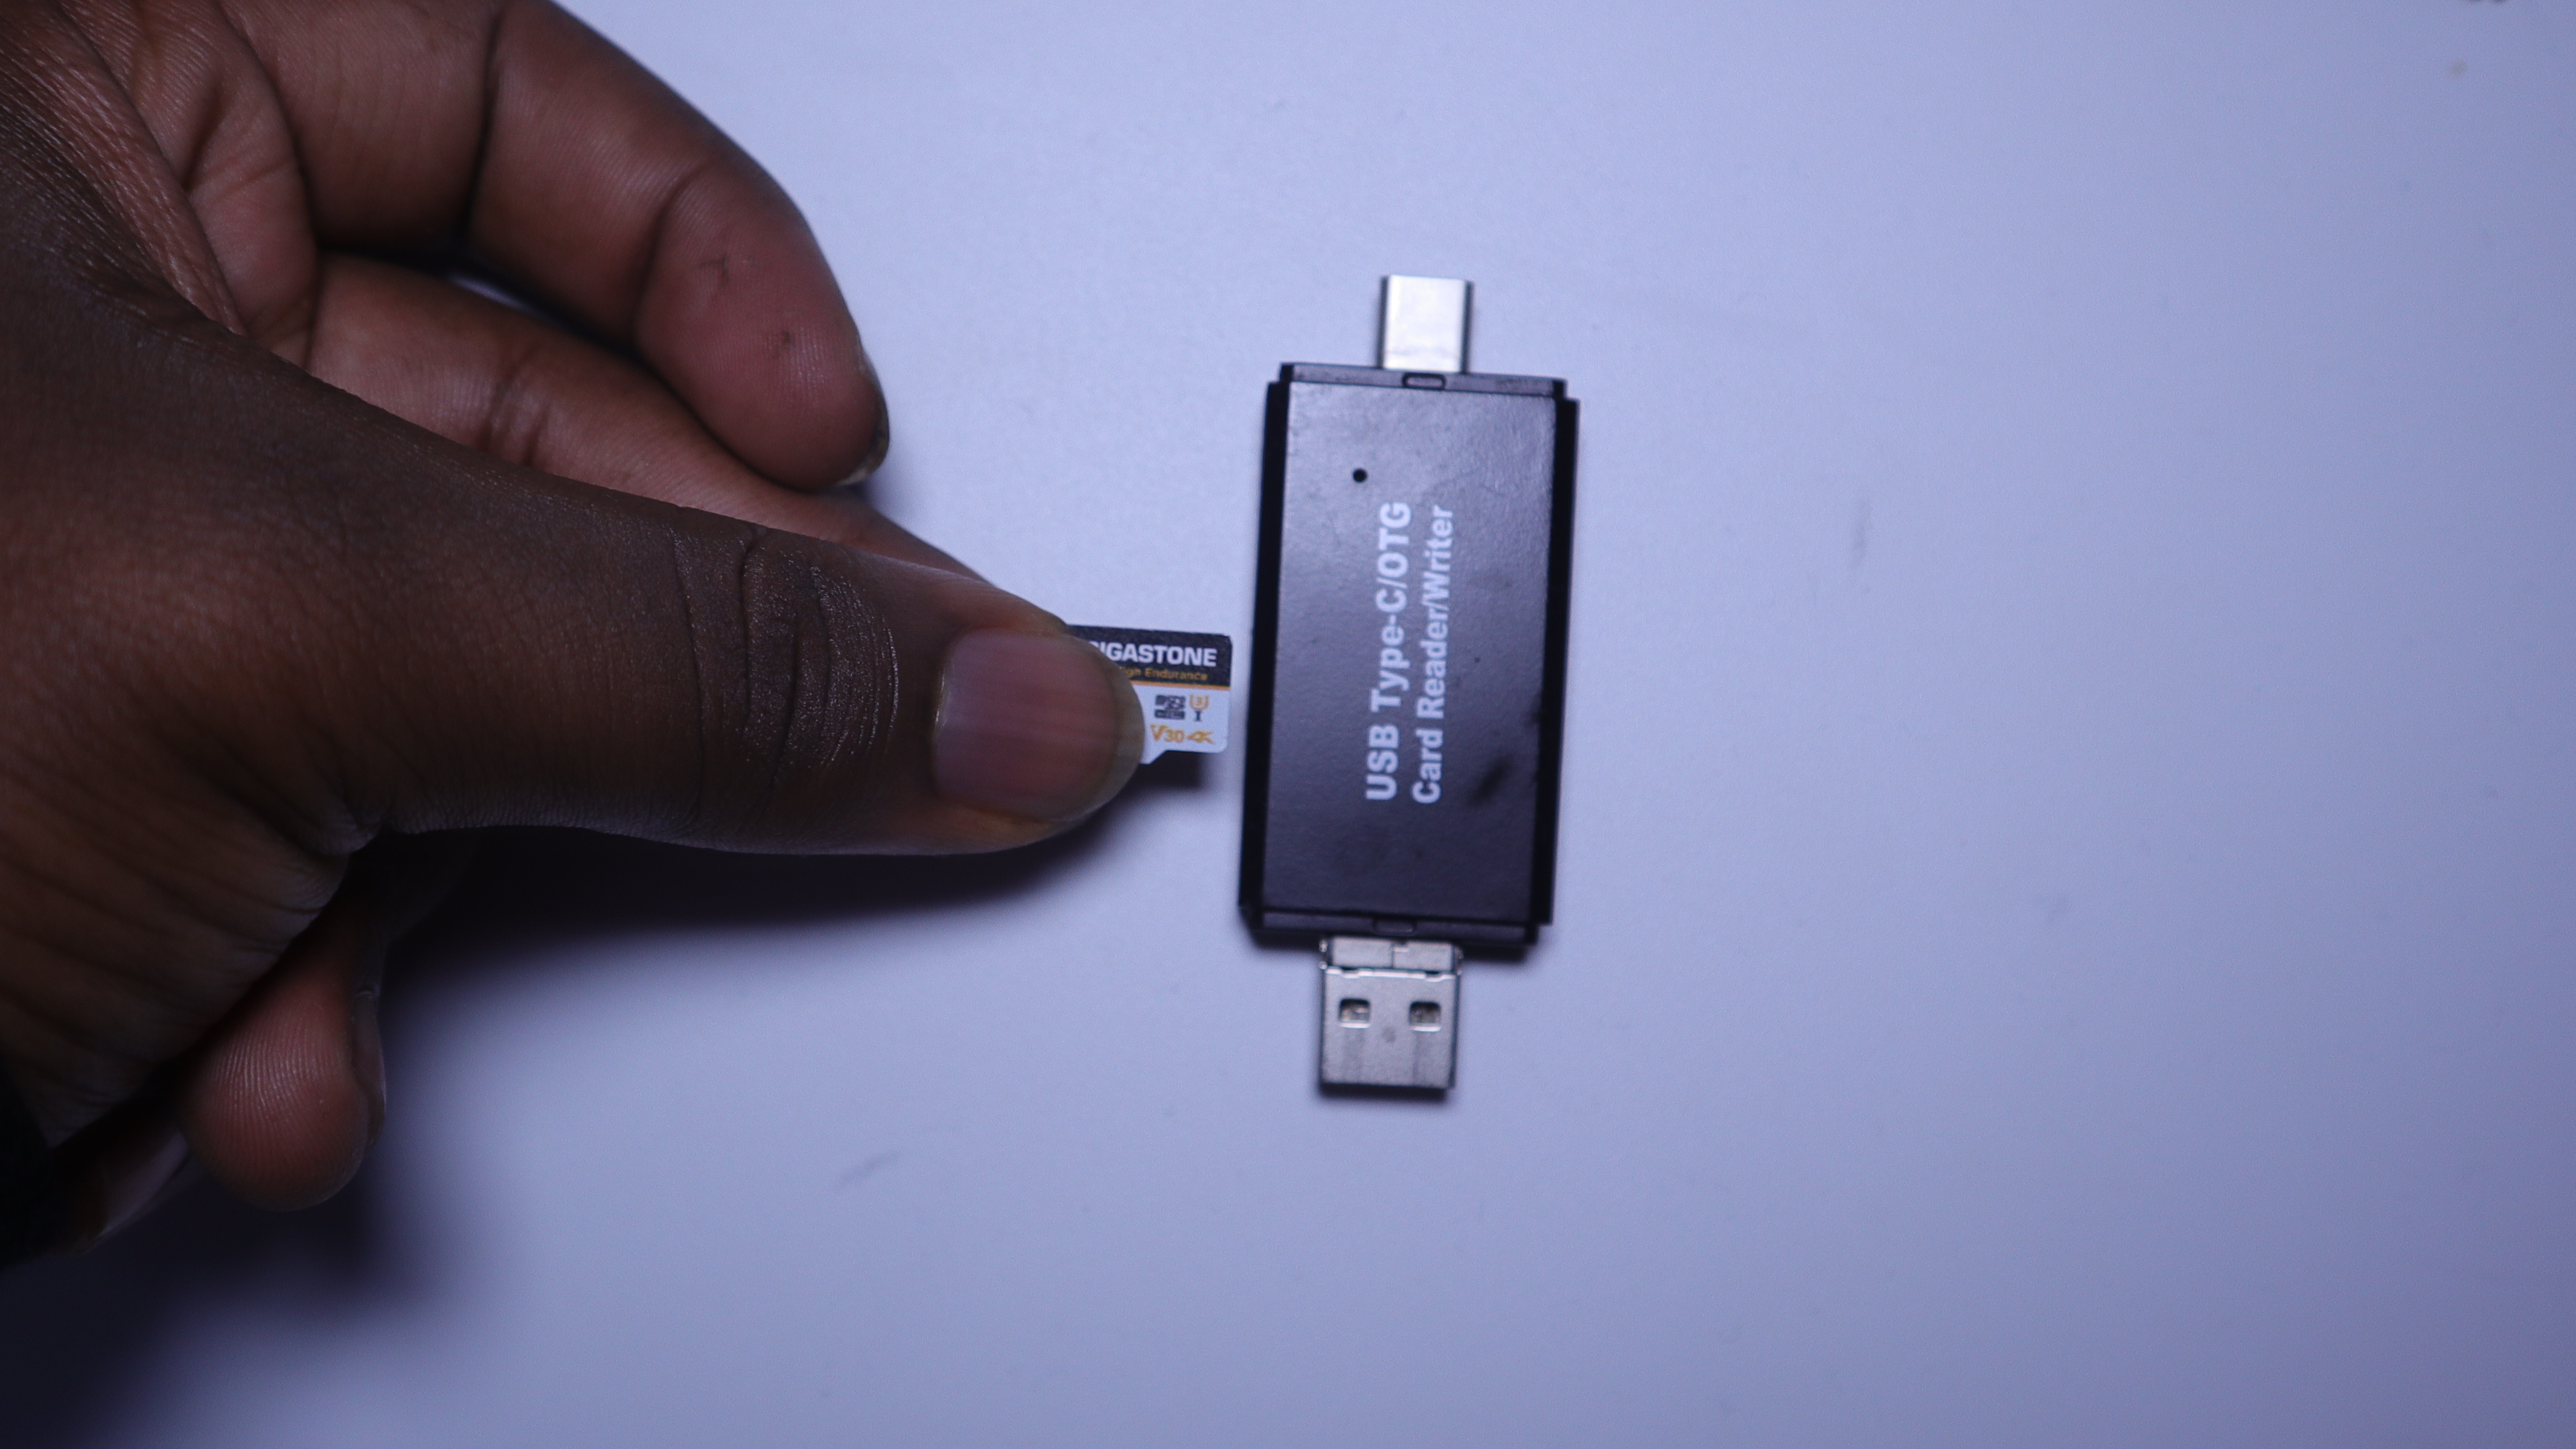
and insert it into your computer
 Step 9
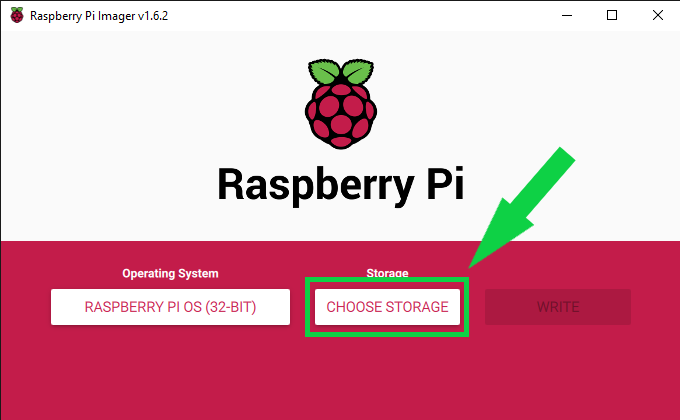
once inserted, in Raspberry Pi imager click "CHOOSE STORAGE" to select the OS Storage Device
 Step 10
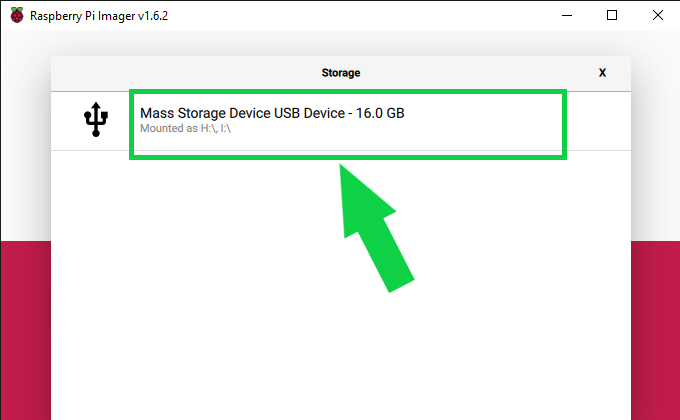
Select your SD Storage
 Step 11
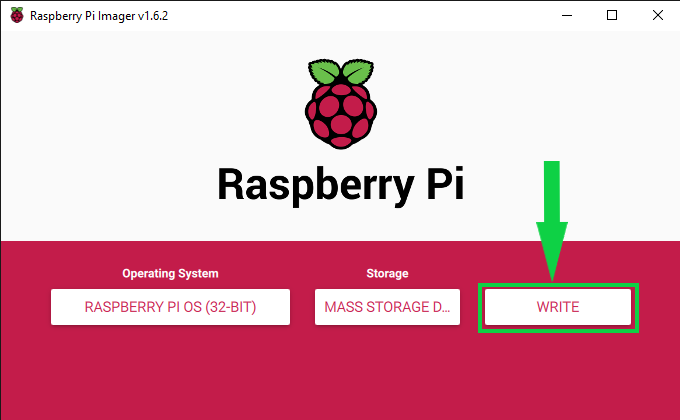
Press "WRITE" to Write The configure OS onto the SD
While SD is Writing, Download and Install Advance Ip Scanner
 Step 13
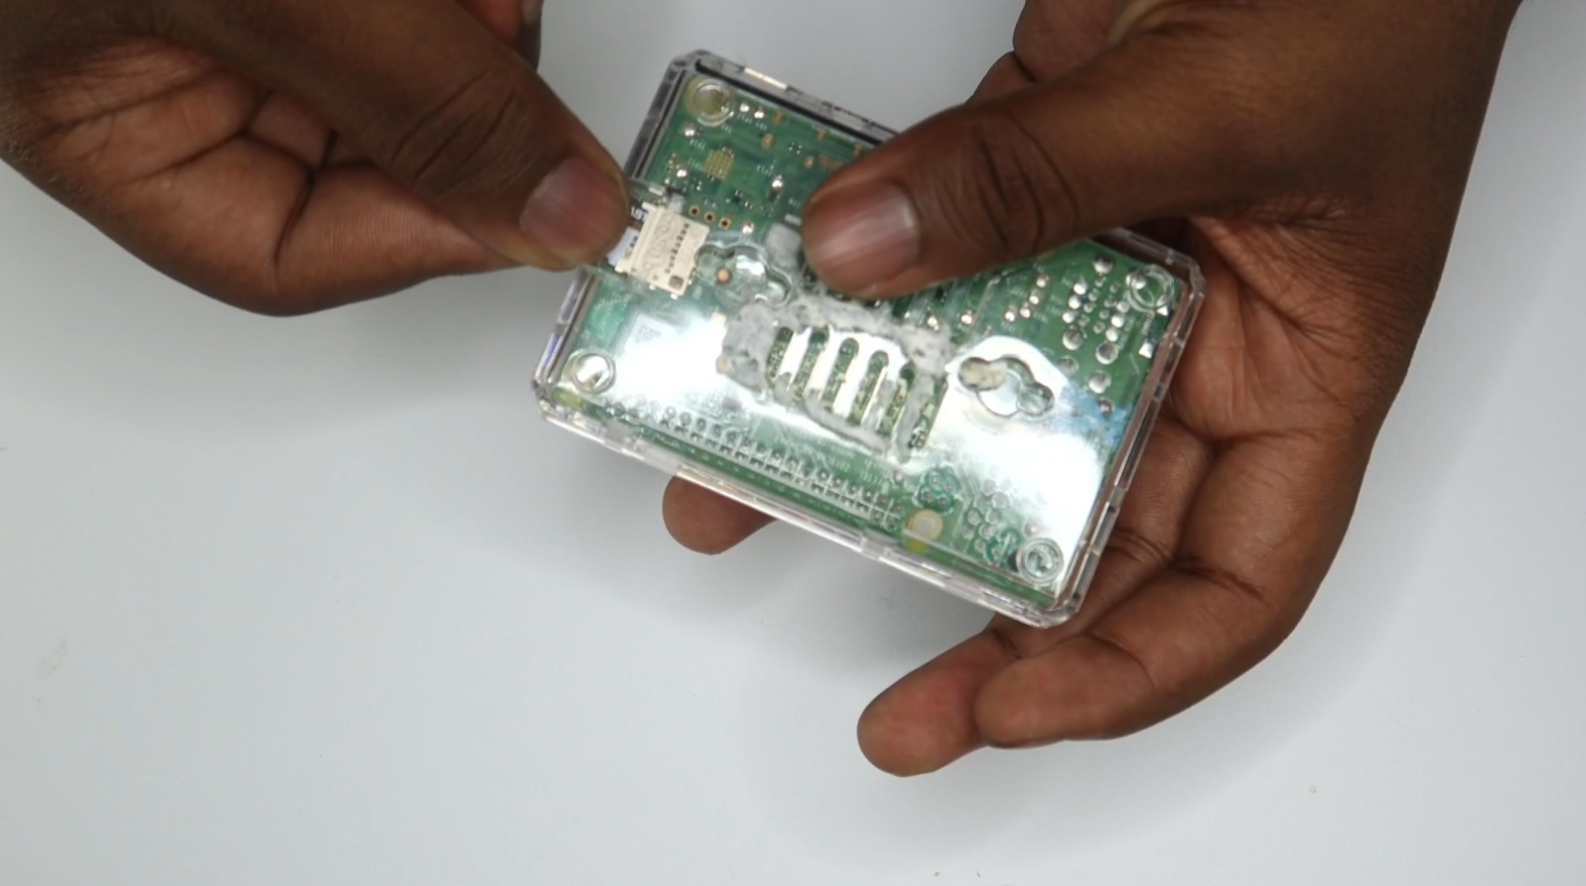
Once SD Writing is completed. remove the SD from the Card Reader/Writer, insert into the Rasberry pi and Turn it On
 Step 14
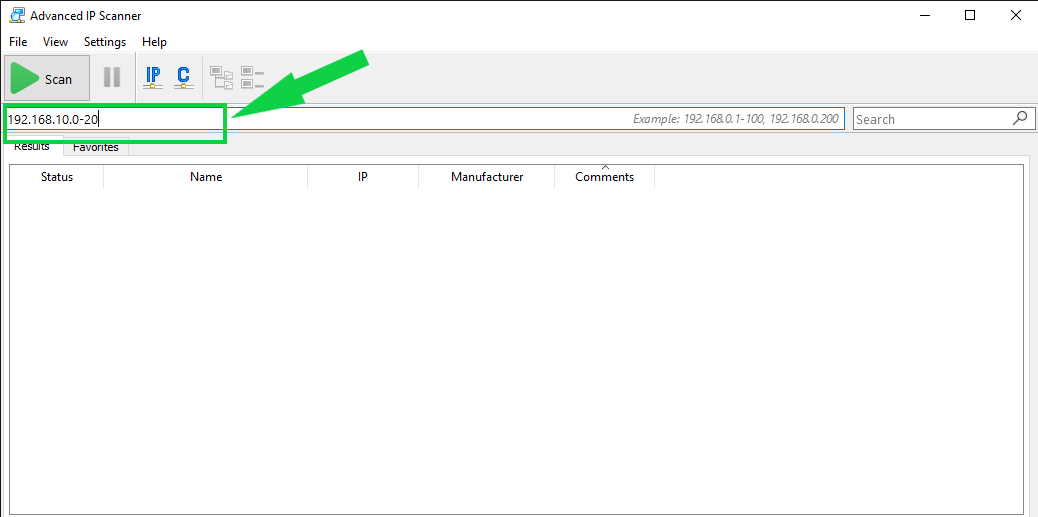
Open advanced-ip-scanner, enter your Router Dhcp range and press Scan
(PS if u do not know your Dhcp range the max ip address per Subnet is 254 so it best to set from 0 to 254
E.g 192.168.1.0-254)
 Step 15
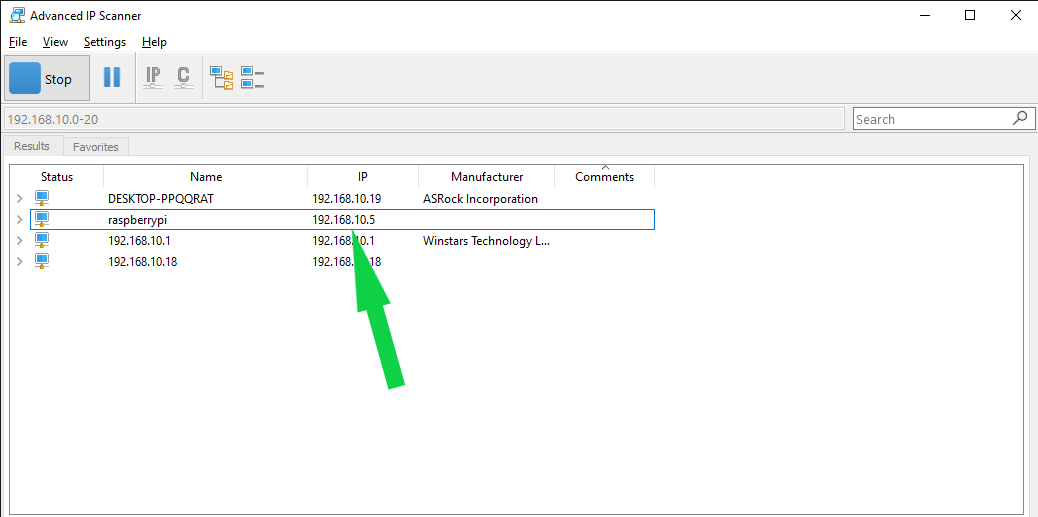
Advance IP scanner will scan for all devices with active IP addresses and hostname on your network. Find and remember the Ip address of the Raspberry Pi
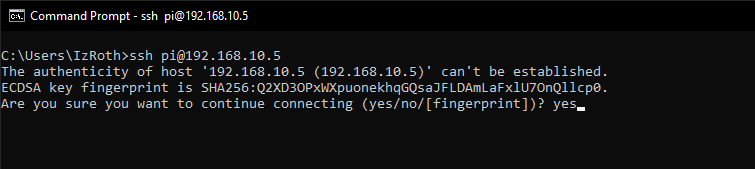
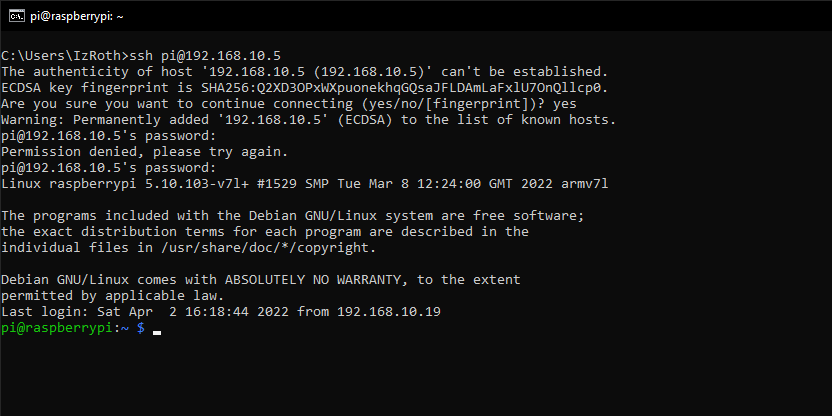
Open Windows Command Prompt and enter the Following Command
ssh pi@192.168.10.5
 Step 17
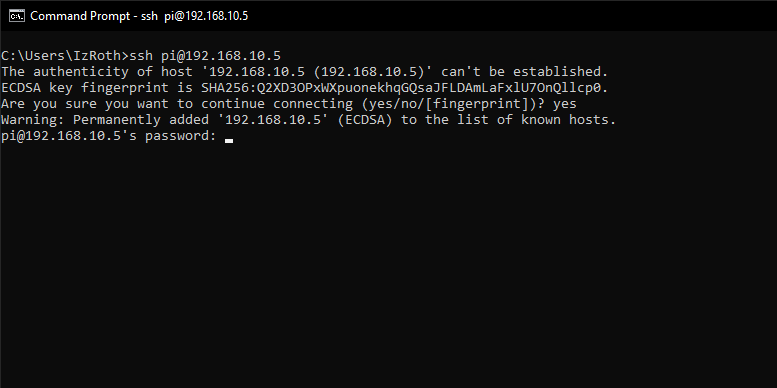
Type "yes" and press Enter to establish a figerprint Key
 Step 18
Type Password and Press Enter
if u see this message then Congradulation you have completed setting up the Raspberry pi
In this article, I have shown you how to install A Rasberry pi OS unto A MicroSD,
i have also shown you how to scan your network for Devices IP address and i have show you how
to establish a SSH connection to a linux devices.
Hope you enjoy and please stay tune for more articles.